How I Learned to Reduce Redness After Microneedling (And What Works)
My No-B.S. Guide to Healing, Hydration, and Post-Microneedling Glow-Up
That One Time I Looked Like a Lobster (And What I Did About It)
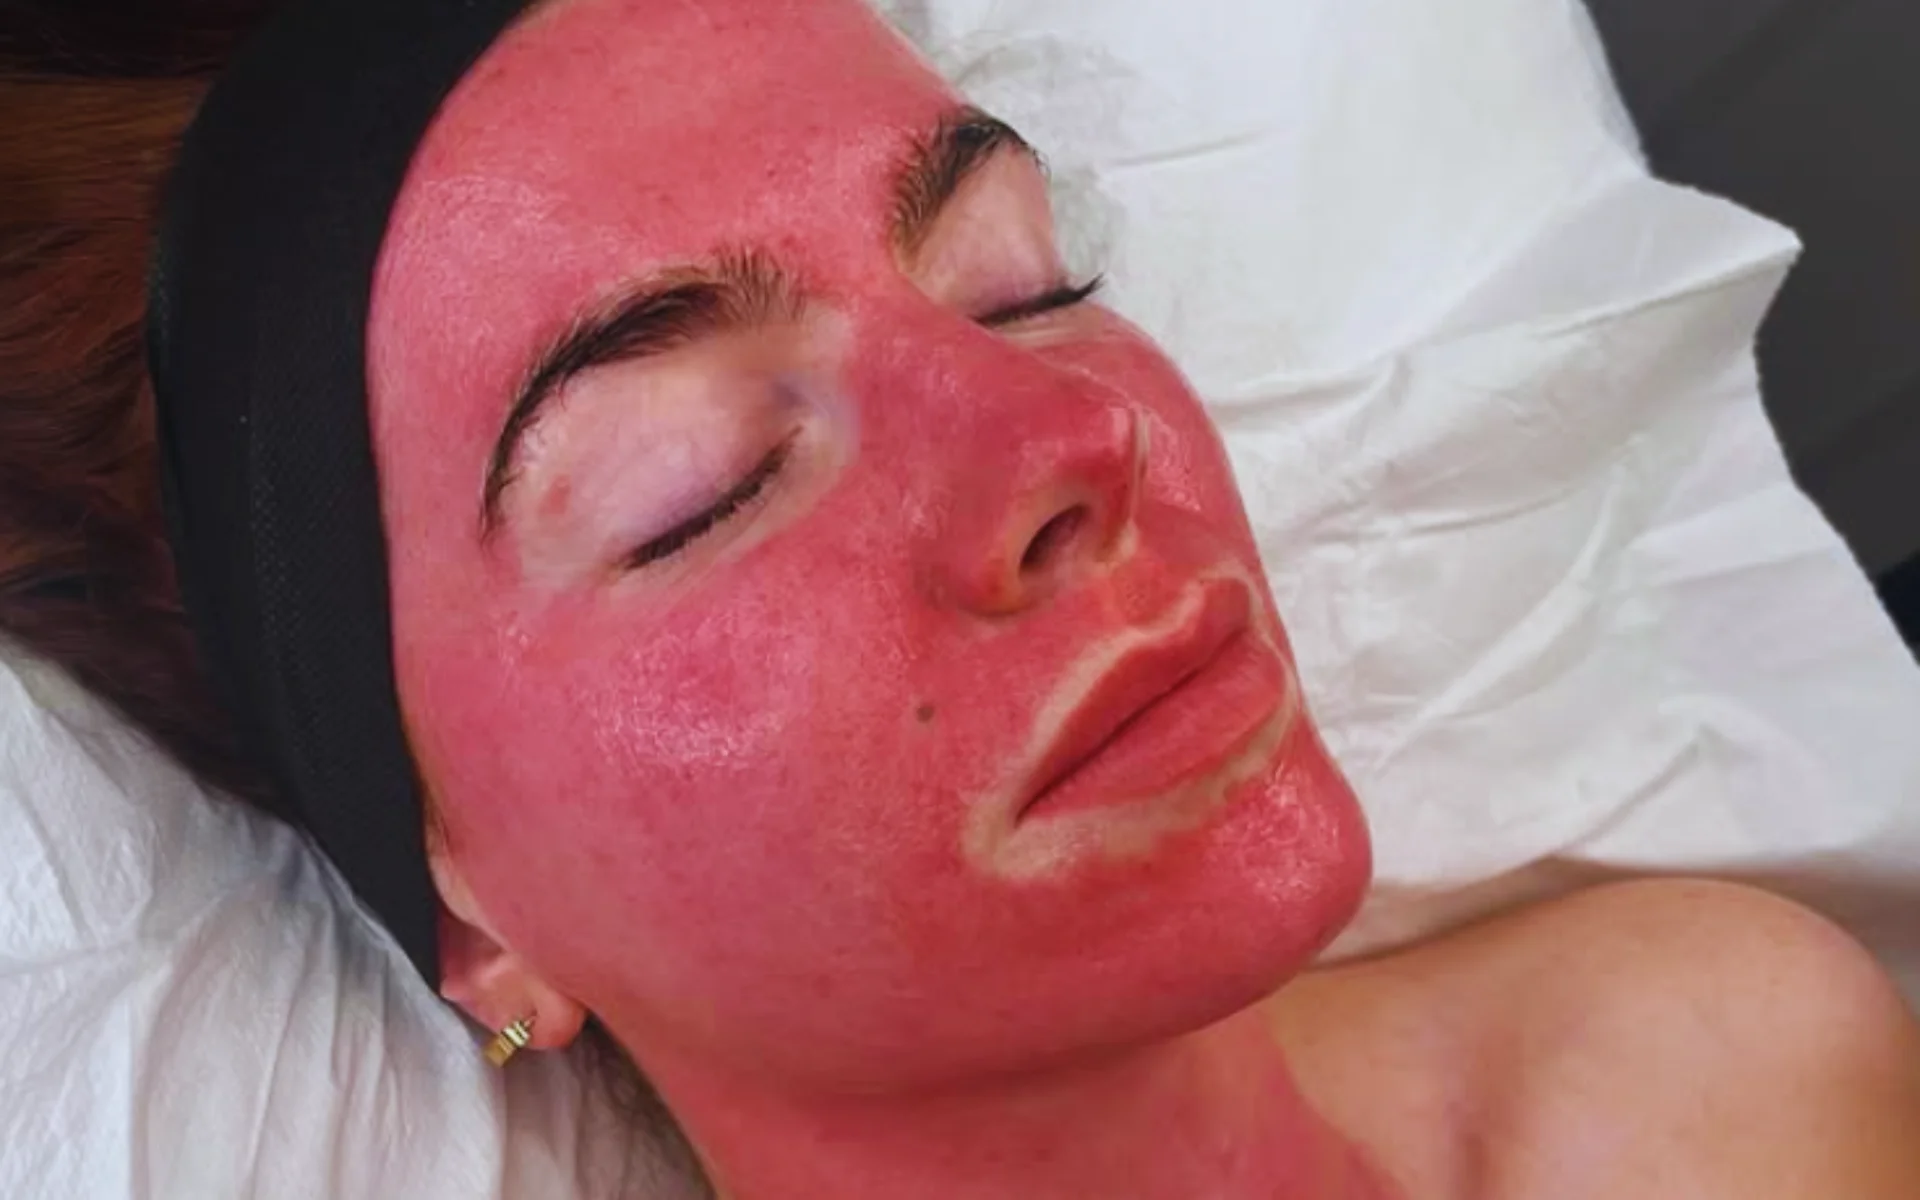
The first time I had microneedling, I left the clinic feeling empowered and excited, until I caught a glimpse of my reflection in the car mirror.
My skin was so red it looked like I’d fallen asleep on a tanning bed. I knew redness was a side effect, but no one warned me just how raw and inflamed my face would look.
Cue the panic Googling: “How to reduce redness after microneedling.”


Suppose you’ve ever felt that burning flush post-treatment, you’re not alone. I’ve since had multiple microneedling sessions, and I’ve made every mistake you can imagine.
But I’ve also learned the most effective, science-backed, and practitioner-approved ways to soothe, heal, and reduce redness after microneedling, without compromising results.
Here’s everything I wish I knew then, that I now swear by.
Understanding Microneedling – Why Redness Happens in the First Place
Microneedling, or collagen induction therapy, is a procedure that uses ultrafine needles to create controlled micro-injuries in the skin.
These tiny injuries trigger the body’s natural healing response, flooding the area with blood and stimulating collagen and elastin production.
That’s why microneedling is so effective for smoothing wrinkles, improving skin texture, fading acne scars, and even brightening hyperpigmentation.
But the healing process doesn’t come without side effects and redness is at the top of that list.
When I first learned about the benefits, I thought the redness would be like a slight flush.
In reality, it looked and felt like a bad sunburn. And for those of us with sensitive or fair skin, it can linger for days.
But the good news? With proper care, you can drastically reduce redness after microneedling and get back to glowing faster.
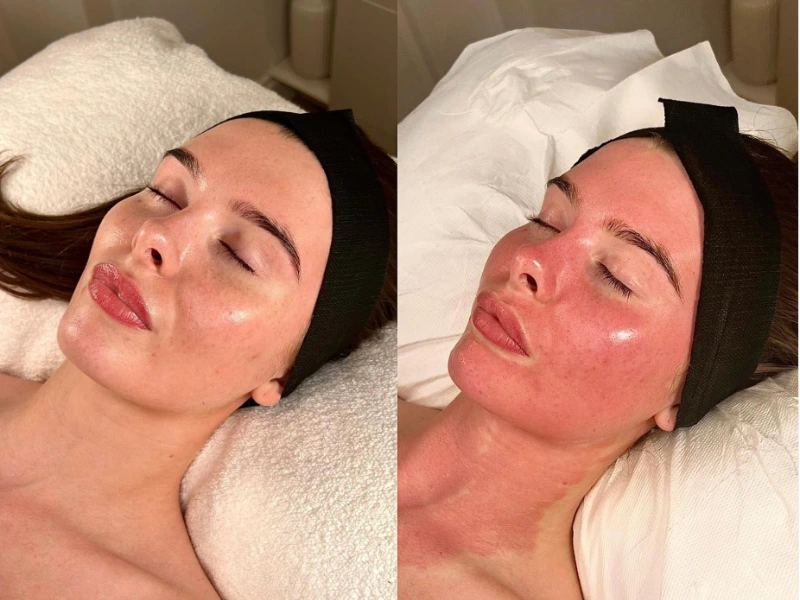
The First 24 Hours – Red, Hot, and Healing
Here’s what my face felt like right after my first session:
- Tight
- Burning slightly
- Extremely red like, “I can’t go out in public” red
- Slightly swollen in areas like the cheeks and chin
During this time, your skin’s barrier is compromised and vulnerable. I learned that the first 24 hours are critical for calming inflammation and setting the stage for healing.
Tip 1: Use a Cold Compress – But Do It Right
This was the first thing my practitioner told me: apply a cold compress to help constrict blood vessels and bring down the redness.
This is important, never apply ice directly on your skin.
What worked for me:
I wrapped a few ice cubes in a soft muslin cloth and gently pressed it over my face in intervals. Alternatively, a chilled jade roller stored in the fridge (not the freezer!) works wonders.
Read: Diet Plan for Breastfeeding Mothers to Lose Weight
Days 2–3: Enter the Peeling and Flaking Phase
Around day two, my redness began to shift from hot and inflamed to dry, tight, and slightly itchy. I also noticed small patches of peeling.
This is normal, your skin is shedding its outer layer and rebuilding stronger, fresher tissue underneath.
Tip 2: Hydrate Like It’s Your Job
If there’s one thing that really helps reduce redness after microneedling, it’s hydration, both internally and topically.
Internally:
- I upped my water intake to at least 2 liters a day.
- I avoided caffeine and alcohol, both of which dehydrate the skin and delay healing.
Topically:
- I stuck to a gentle hyaluronic acid serum and followed it with a non-comedogenic moisturizer.
- My favorites? La Roche-Posay Hyalu B5, Avene Cicalfate+, and RescueMD DNA Repair Complex the latter is infused with lapachol, a patented anti-inflammatory derived from the Pau d’Arco tree. It visibly calmed my redness and supported my skin’s recovery better than anything else I tried.
Read: Toenail Cutting Guide – Best Tips & Techniques
What I Stopped Doing
I’ll be honest after my first session, I sabotaged myself by jumping back into my regular routine too soon.
That meant using vitamin C, retinol, and exfoliants and applying makeup within 48 hours. Big mistake.
Here’s what I’ve since learned to avoid to actually reduce redness after micro needling and protect those collagen-boosting results:
Avoid Makeup for At Least 72 Hours
Your skin has micro-channels that are open for up to 24 hours post-treatment.
Putting on foundation, powder, or concealer during this time is like pouring dirt into fresh wounds. Not only does this prolong redness, but it risks infection.
Now, I skip makeup for a solid three days and when I finally do wear it, I make sure to clean all my brushes and tools thoroughly with antibacterial soap.
Avoid Retinoids, Acids, and Actives
Your skin is in recovery mode. Treating it with anything too strong will trigger more inflammation. For the first 5–7 days, I stay far away from:
- Retinol and tretinoin
- Vitamin C serums
- AHAs and BHAs (like glycolic acid and salicylic acid)
- Enzyme exfoliants
Instead, I lean into calming ingredients like:
- Aloe vera
- Centella Asiatica
- Niacinamide (in low concentrations)
- Colloidal oatmeal
What You Put On Your Skin Is Just as Important as What You Put In Your Body
Reducing redness after microneedling isn’t just about slathering on calming creams. Your internal health plays a huge role, too.
Tip 3: Eat Anti-Inflammatory Foods
For the first week post-treatment, I focused on skin-nourishing foods:
- Leafy greens (kale, spinach, arugula)
- Omega-3-rich salmon and flax seeds
- Vitamin C-packed fruits like oranges and kiwis
- Zinc-rich pumpkin seeds
- Bone broth for collagen support
And yes I skipped alcohol completely for the first 72 hours. It’s a vasodilator that increases blood flow to the skin, and it dehydrates you. Not a combo you want while healing.
The Sun – Your Skin’s Enemy #1 After Microneedling
I learned this the hard way when I stepped outside for just 15 minutes without protection the day after a session. My redness returned with a vengeance.
Tip 4: Become a Vampire (for at Least a Week)
After microneedling, your skin is hyper-sensitive to UV rays. Even mild sun exposure can cause increased redness, irritation, and even hyperpigmentation. For the first 72 hours, I stayed indoors as much as possible.
If I had to go out:
- I wore a wide-brimmed hat and sunglasses.
- I waited 24 hours before applying sunscreen and only used mineral sunscreens with zinc oxide (no chemical SPF!).
Once my skin was less raw, I used EltaMD UV Clear SPF 46 religiously and still do.
Read: 25+ Small Tattoo Ideas for Women Elegant & Meaningful Designs
Sleep, Sweat, and Skincare – Finding the Balance
Tip 5: Prioritize Sleep
During recovery, your body produces the most collagen while you sleep. I gave myself permission to rest, kept my head slightly elevated to reduce swelling, and changed my pillowcase daily to avoid bacteria buildup.
Tip 6: Skip the Gym (Seriously)
Exercise increases circulation, which means more redness.
I avoided:
- Cardio
- Hot Yoga
- Saunas, jacuzzis, steam rooms
- Long hot showers
Even sweating from cleaning the house left my skin redder. Instead, I took it easy and embraced the art of doing less. Trust me, your skin will thank you.
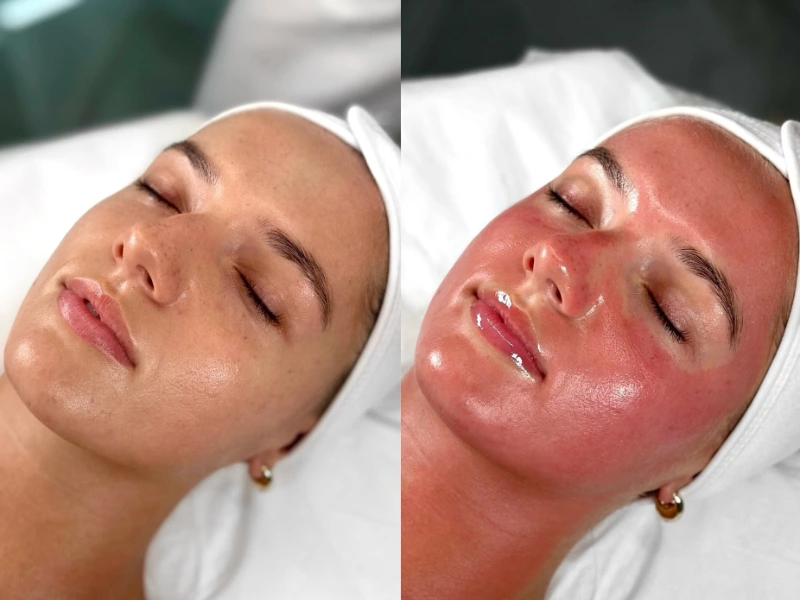
1 Week Later – The Glow Kicks In
By day 6 or 7, my skin stopped peeling, the redness fully faded, and that post-microneedling glow appeared.
My pores look smaller, my acne scars were visibly smoother, and everything felt firmer. It was that moment when I realized: all the careful aftercare? Worth every step.
Long-Term Strategies to Reduce Redness After Microneedling (Before It Starts)
Now that I’ve done multiple treatments, I’ve picked up strategies that help minimize redness before it even shows up:
- Communicate with your provider. I now ask them to use shorter needle lengths or reduce the speed if I’m doing a maintenance session.
- Pre-load my skin with hydration. A week before my session, I focus on hydrating products and cutting out retinoids.
- Take acetaminophen, not NSAIDs. NSAIDs (like ibuprofen) can inhibit the inflammatory response that builds collagen. Acetaminophen reduces discomfort without impacting healing.
- Avoid alcohol for 48 hours before. This helps reduce flushing and bruising.
- Prep with zinc and vitamin C supplements. They support tissue repair and boost your skin’s ability to heal quickly.
Microneedling Recovery Timeline (From My Real Experience)
Here’s how my skin typically progresses post-treatment
| Timeframe | What I Experience |
| 0–24 Hours | Redness, warmth, slight swelling |
| Day 2 | Redness fading, dryness begins |
| Day 3 | Peeling/flaking starts; use calming serums |
| Day 4–5 | Redness mostly gone, skin looks smoother |
| Day 6–7 | Glow kicks in; skin starts to look plumper |
| Week 2–4 | Collagen boost starts becoming visible |
Final Thoughts – Redness Is Temporary, But Confidence Is Forever
Microneedling is powerful and the results are worth it. But it’s not just what happens in the clinic that matters.
What you do after is where the real transformation takes place.
By understanding how to reduce redness after microneedling, you’re not just speeding up your recovery, you’re respecting the process your skin is going through to heal, rejuvenate, and regenerate.
Be patient. Be gentle. And treat yourself like the glowing goddess you’re becoming one microneedle at a time.


